Setting up Google OAuth 2.0 Credentials
This document will help you set up a Google OAuth 2.0 service on your Google developer console and connect it to your Events Manager I/O installation.
Screenshots and specific links/locations of options in the Google interface may vary without warning as they do regularly change their interface. For the most up-to-date instructions on general setup of OAuth 2.0 on Google please see their documentation, we will also link to relevant setup instructions on their docuemtation as well.
Create a Project and Enable APIs
If you have not created a project before or require a new one, create a new project first by clicking on the top right of your console screen where you can select your project.
Once you have your project selected and set up, we need to enable the APIs of the services you wish to import and export from. Visit the APIs library and enable the Google Calendar and/or Google Sheets APIs.
Set Up your Consent Screen
Before you create OAuth credentials, you need to set up the consent screen. The minimum required fields to get up and running are the Application name, scopes and authorized domain.
For scopes, you will need to add ../auth/spreadsheets and ../auth/calendar. If you are only using one of the Google services, you need only enable that one. Additionally, if you only intend to import, then you can use the read-only version, such as ../auth/spreadsheets.readonly.
Important Note : You do not need to get your application verified if only you or trusted users will be using I/O to administer your site events, but you will see warnings about an unverified application when linking accounts to your site.
Based on the above, you also may or may not need to fully fill out this information. If you have users that may not fully trust you (i.e. non-site admins or large organizations), you should fill out all the information on this page and also get your application verified.
Add an OAuth Client
Once you've set up your consent screen, you can then add an OAuth Client ID which I/O will use to connect with your Google accounts and access Sheets/Calendar.
- Visit the credentials page, making sure you have the right project selected and click the Create Credentials button.
- Choose OAuth Client ID
- Select 'Web Application'
- For Authorized JavaScript origins enter your hompage URL
- For Authorized redirect URIs use the URL found in your Dashboard > Events I/O > Settings > Server-Side Credentials (Tab) > Google
- Save your settings
Once created, you will have the option to download a JSON file by clicking the download icon next to your new OAuth Client ID, or at the top of the page when viewing your Client ID. You will use this file to submit to your Google server settings as described in step 5:
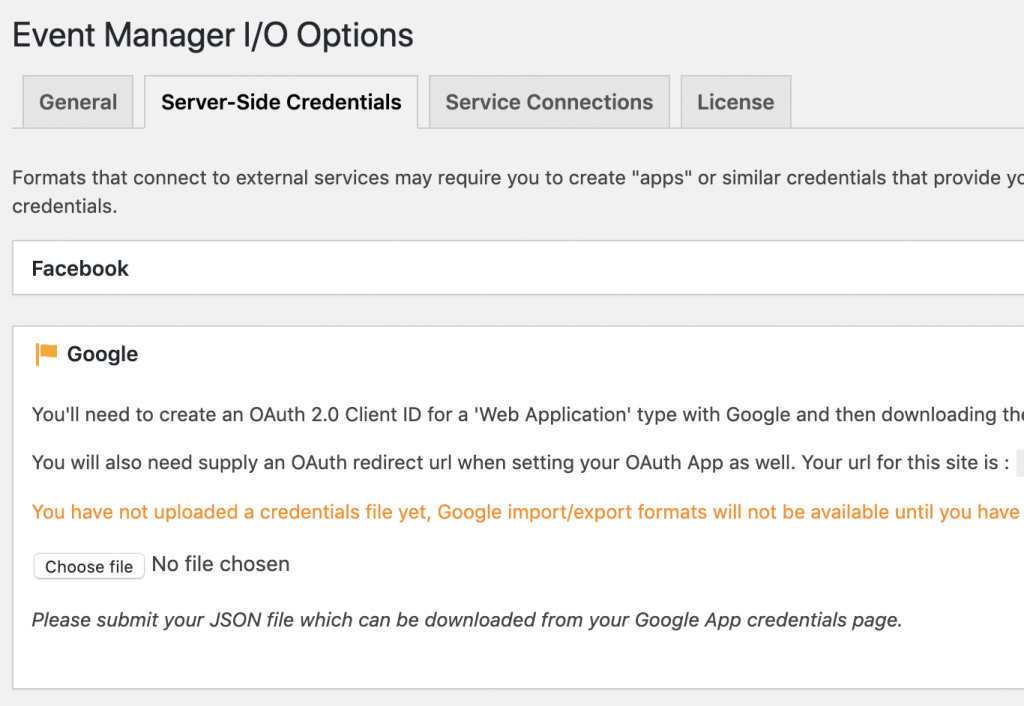
Once successfully uploaded you'll see a green checkmark in place of the orange flag in the screenshot above.
Proceed with Account Connections
After completing these steps, you and other admins should be able to access the settings page 'Service Connections' tab and connect accounts to your site.