Stripe Checkout Setup
For more information about Stripe in general, please see our Stripe FAQ page. This page will help you set up the Stripe Checkout payment method.
Once you have signed up for a Stripe account. Setting up Events Manager to receive payments is fast and straightforward in 4 simple steps!
1. Install Events Manager Pro Stripe plugin
You can download the Events Manager Pro Stripe plugin from the downloads page. From here, you would install it just like you installed Events Manager Pro, via the Plugins > Add New > Upload Plugin area.
Once installed and activated, you should see Stripe as a payment method under your Dashboard > Events > Payment Gateways admin area. Click on the Stripe gateway to access the settings.
2 . Obtain and save your API credentials
At this point, make sure you're in Test Mode, or Live Mode, both your API credentials and Webhooks further down are different in live and test mode, and you'll need to repeat these steps when moving from testing to production.
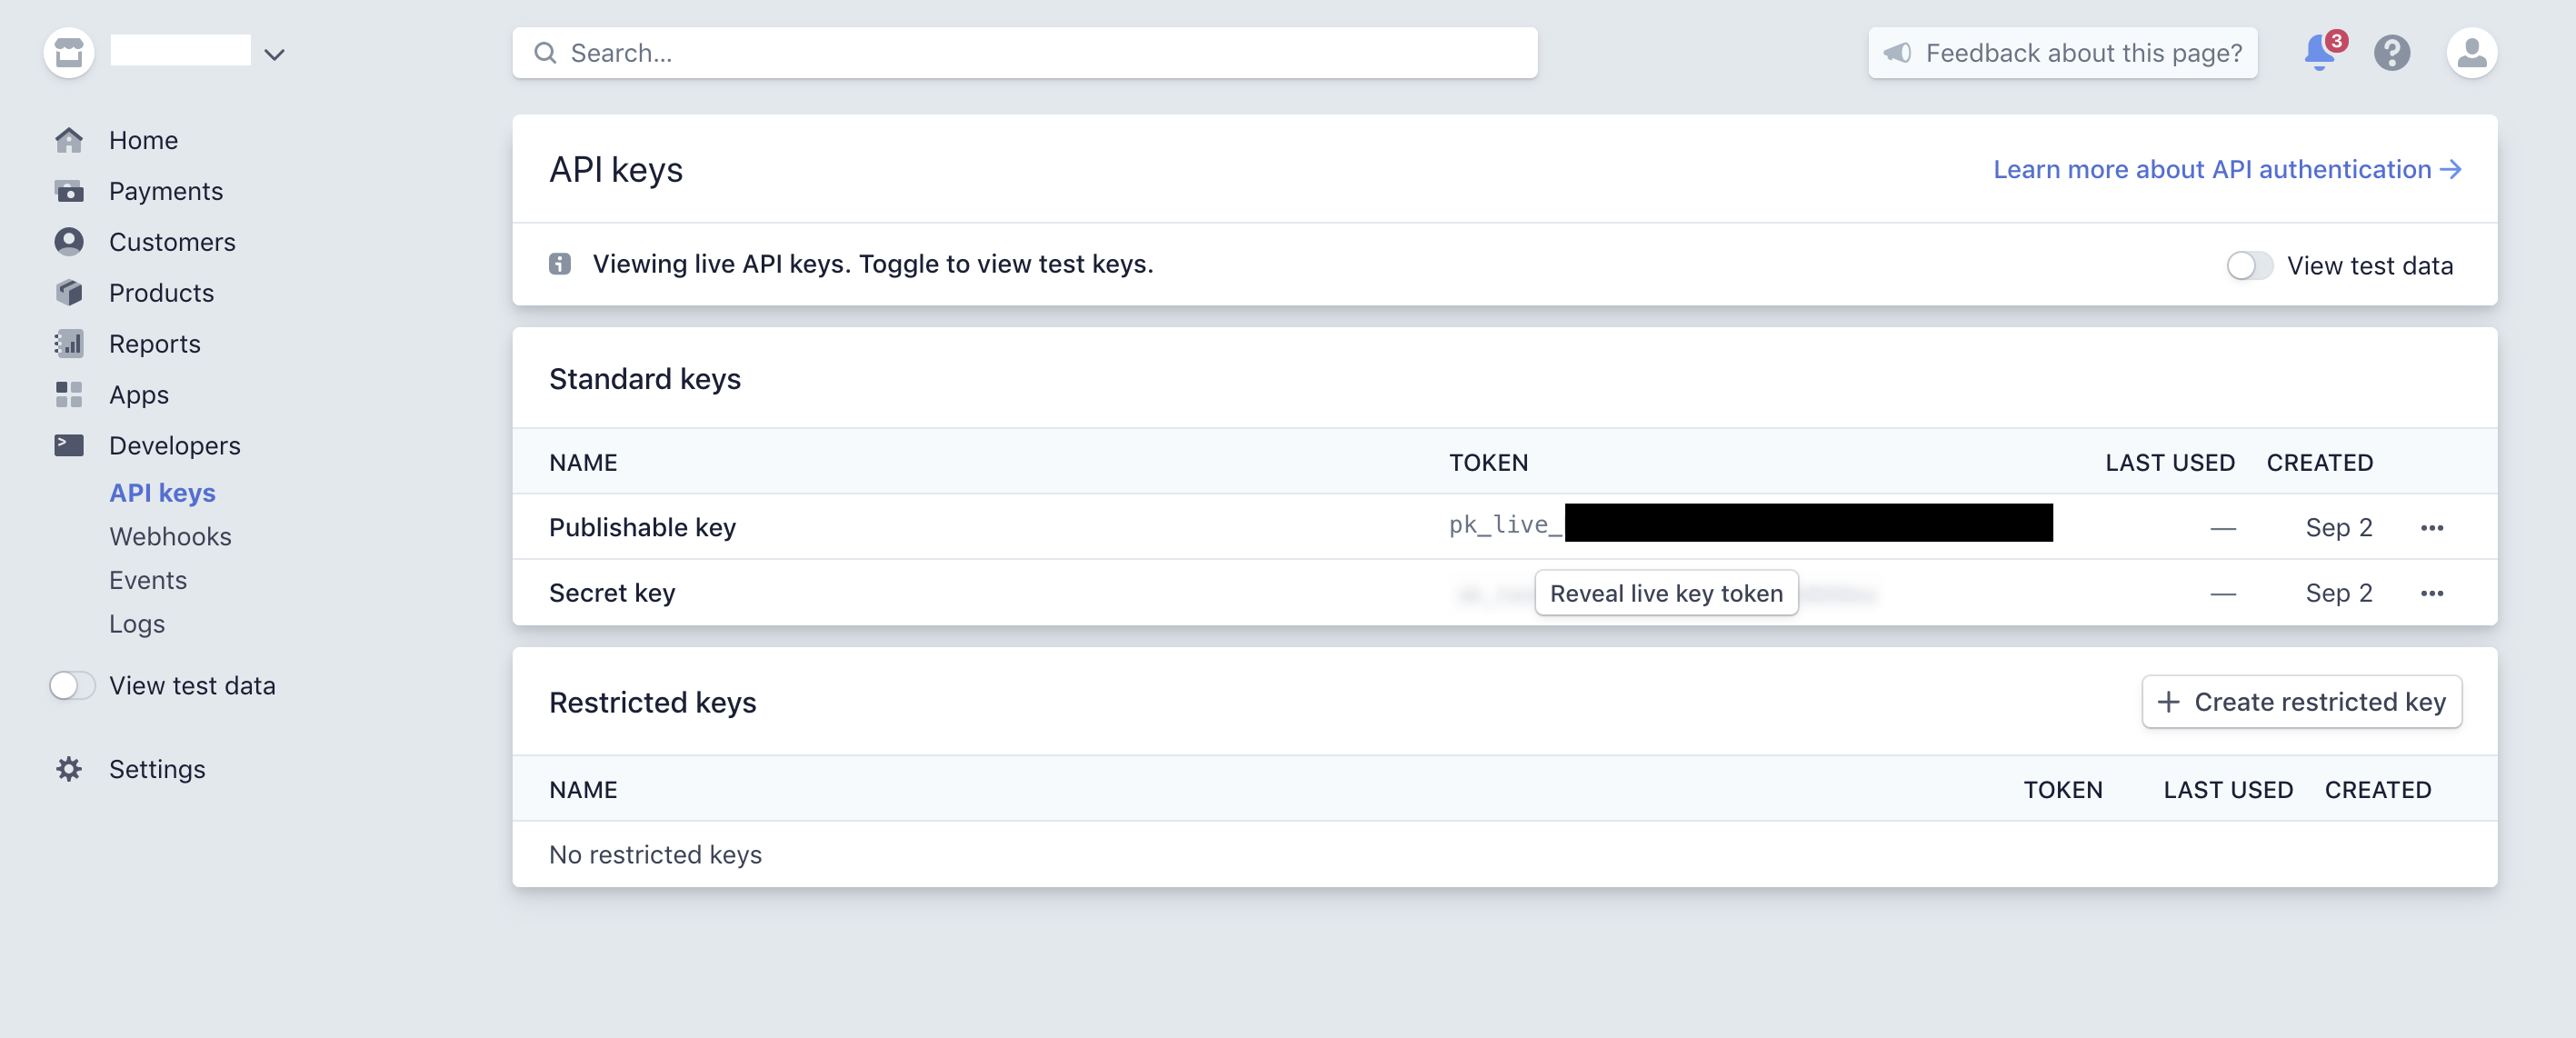
Log into your Stripe Dashboard, and access Developers > API Keys from the left-hand menu. From there, you'll have access to your standard API keys, as shown below. Copy and paste these into the Stripe Checkout Credentials section of your settings page.
3. Create a Webhook
This will allow your website to immediately be aware of when a booking payment is completed, or if any refunds or chargebacks were initiated. Still on the Stripe Dasbhoard, click on Developers > Webhooks and you'll see the following page.
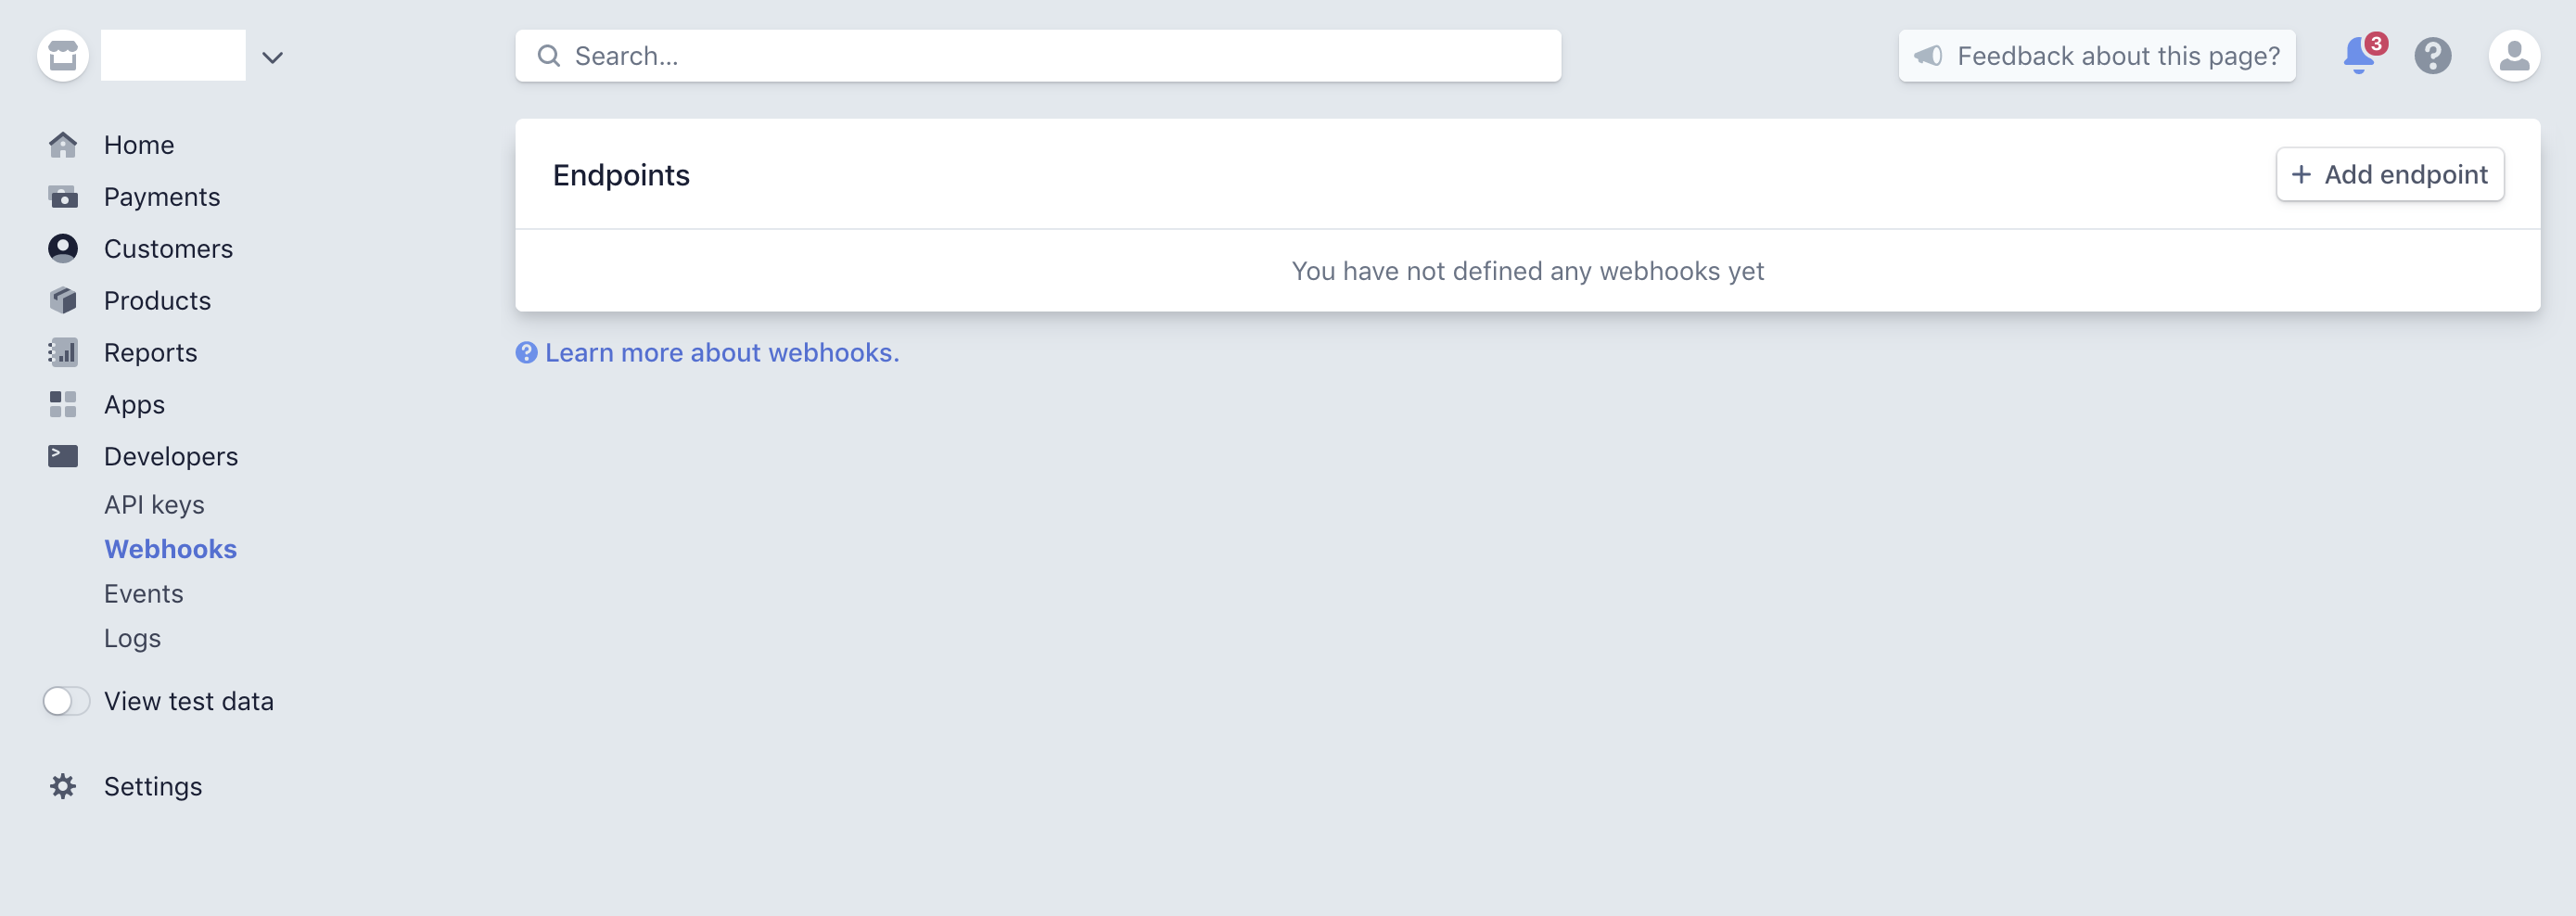
Click on the '+ Add Endpoint' button. You will then be able to fill this form to create a new webhook.
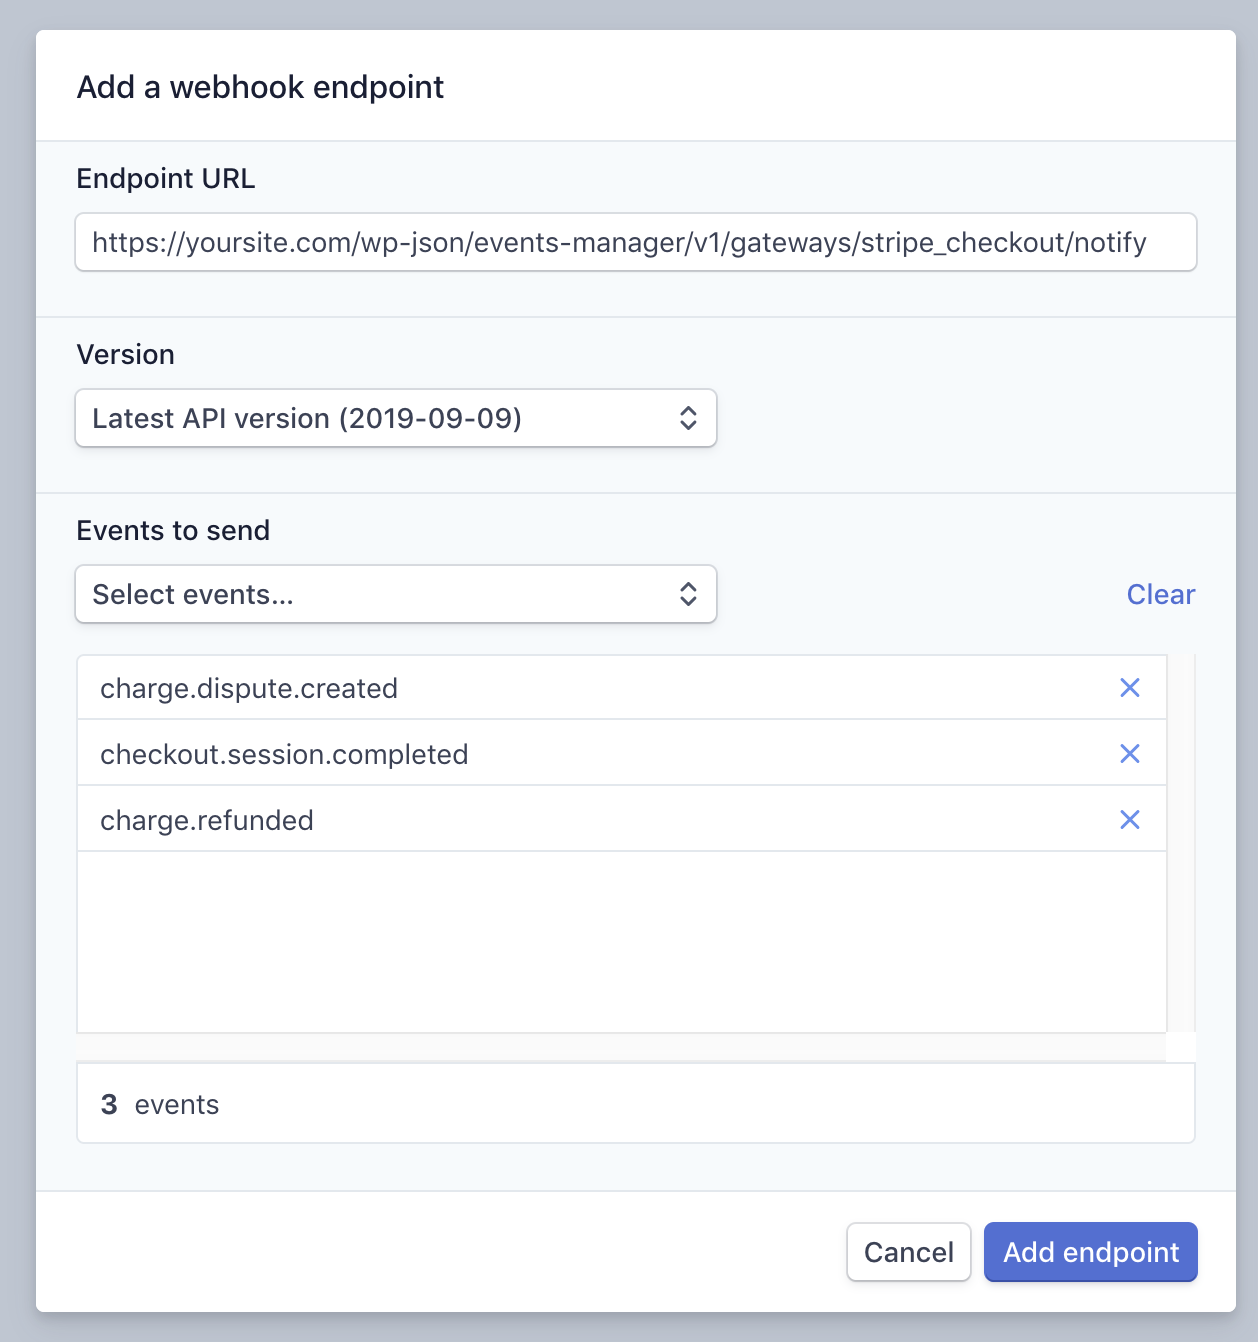
The endpoint URL you need to use will be displayed in the Stripe Gateway settings page on your site, under the Stripe Checkout Credentials section. The Version you should choose is currently 2019-09-09 at the time of writing. You should also make sure to add these three events:
- checkout.session.completed
- charge.refunded
- charge.dispute.created
Your form should look similar to the one below:
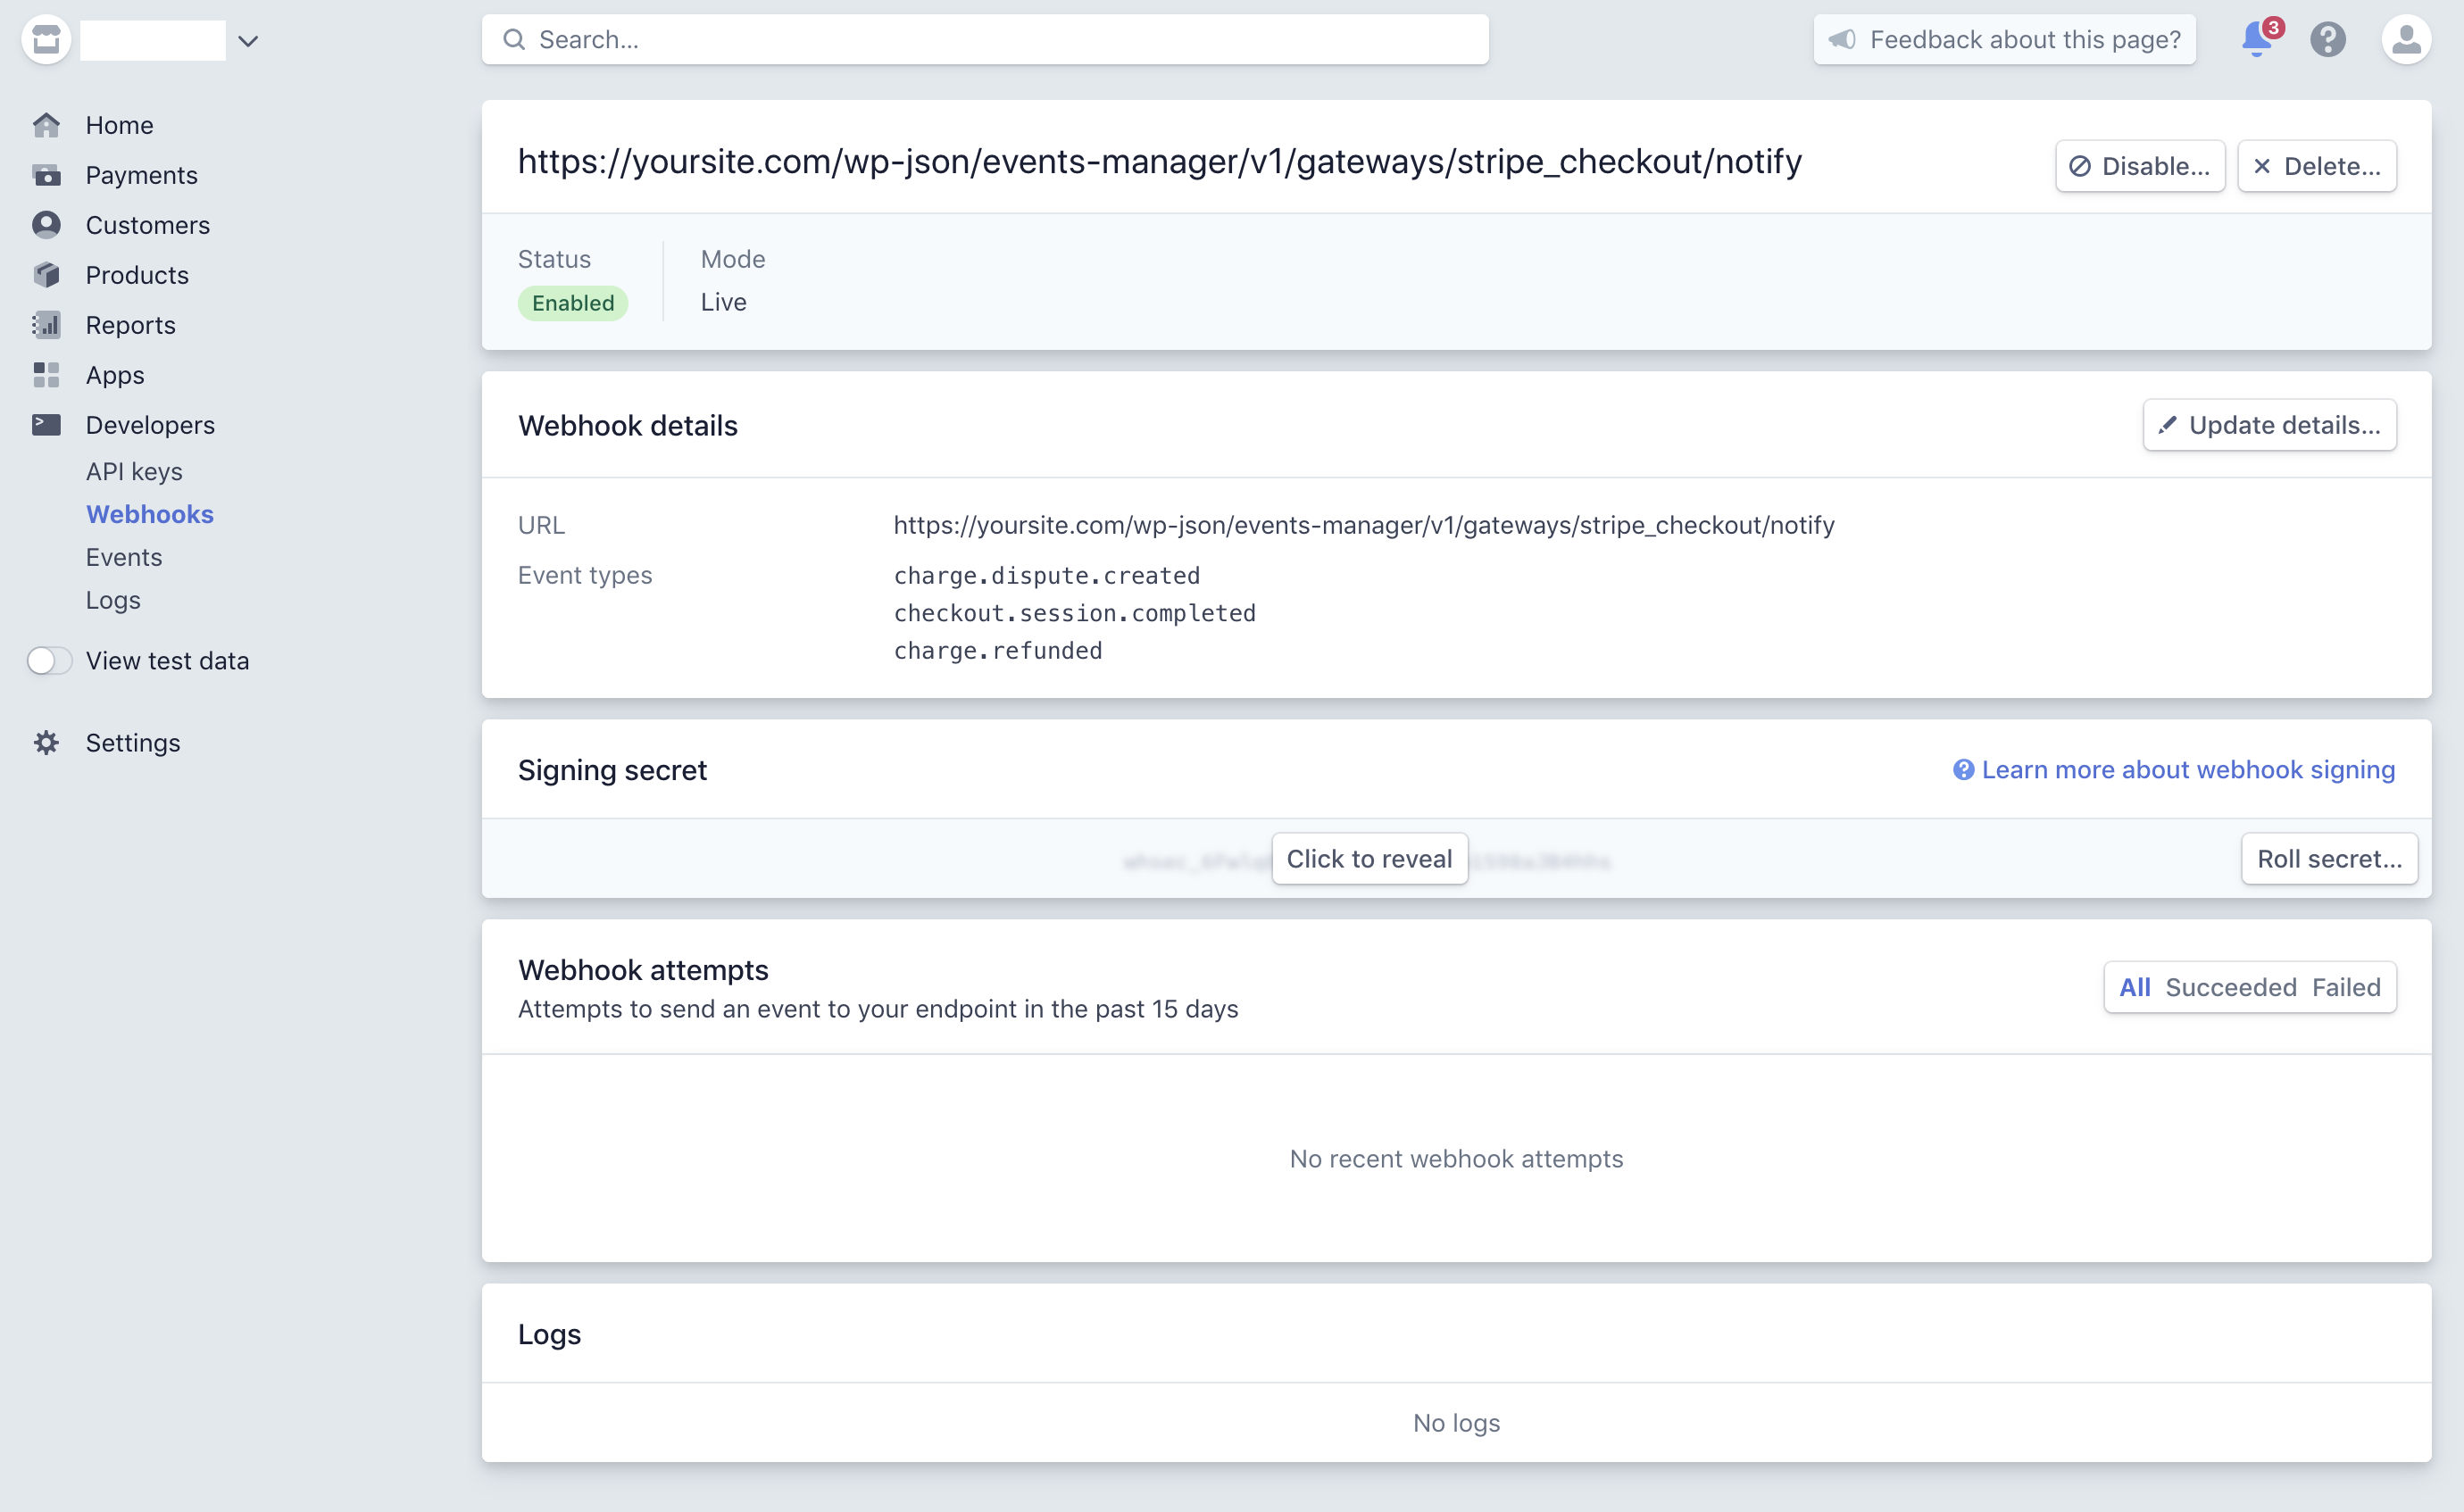
Once you've submitted this, you'll be shown information about your new webhook. Click the 'click to reveal' button in the Signing Secret section and copy your Signing Secret key, which you'll then paste just below your API keys in your Stripe settings page of your website.
If you're in test mode, one final step is to make sure your website is listening for these webhooks is to send a test webhook, a button will appear on the top-right of the page allowing you to do so. You'll receive this for any test webhook that was successful:
{ "message": "This is a webhook test response, which means the endpoint is correctly configured." }
4. Complete your settings page
The three steps above are enough to start accepting payments already, but there are various other options that you may find useful. Whilst most are quite self-explanatory, we'll highlight one that is often useful for reserving spaces during the booking process.
"Delete Bookings Pending Payment" and prevent double bookings
When a user starts the payment process, a booking is already created and given the 'awaiting online payment' status. During this time, users are redirected to Stripe.com and enter their payment information there. You can hold booking spaces during this process (you can choose for how long just above this setting), to avoid double bookings if two users are interested in the last ticket. If payment is not completed in your set amount of time the reserved space is freed, the booking is deleted and the user payment will not go through for that checkout session.
5. Activate the Gateway and make a test payment
Once you're done with the settings page, you should go back to the Gateways page (Events > Payment Gateways) and activate the payment method, which you can do when hovering over the Stripe payment gateway.
We always suggest you try and make a test payment for an event, see here for test card numbers. Once you have made the booking, and verified that the booking has been marked as approved automatically after payment, you can also refund that payment and see that the booking will also get cancelled automatically.