Zoom Events
Our Zoom integration plugin allows you to integrate with the following Zoom products.
This Zoom Integration add-on requires a Zoom account with an active Pro plan (payment required) and Events Manager version 5.9.7.5 or later.
All three require the same initial setup to get started and require no further setup. Below are the general setup instructions, the links above will provide you with specific instructions for each type.
Note that your EM Zoom Settings which is referenced throughout this page is located in WP Dashboard > Events > Settings > General (tab) > Zoom
Step 1 - Install Zoom Integration Add-on
Download the Events Manager for Zoom integration plugin, and install as you would a regular WordPress plugin. Also, ensure you are running Events Manager 5.9.7.5 or later.
Step 2 - Create an OAuth App on Zoom
You will need to "create" a new OAuth App on Zoom, which is very easy to do and simply requires filling out a couple of forms and obtaining a secret key and client ID.
If you haven't signed up for a Zoom account, you'll need a Pro plan for access to their API, along with purchasing a Zoom webinar or rooms add-on should you require either of these.
We'll start by referring you to their official Create Zoom OAuth App instructions, which would contain the most comprehensive and up-to-date information. We will detail specific settings you will need to include.
Initial app settings
You'll start by visiting the Create App page on Zoom, and choosing to create an OAuth app type.
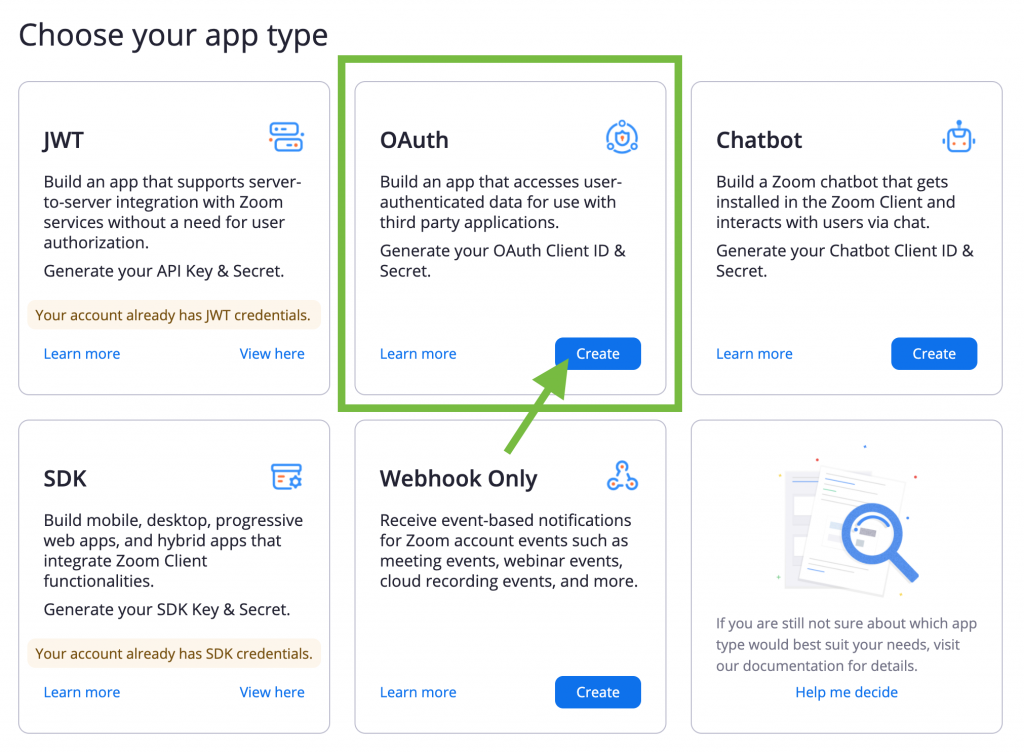
When you first create an App, you'll be presented with the following screen:
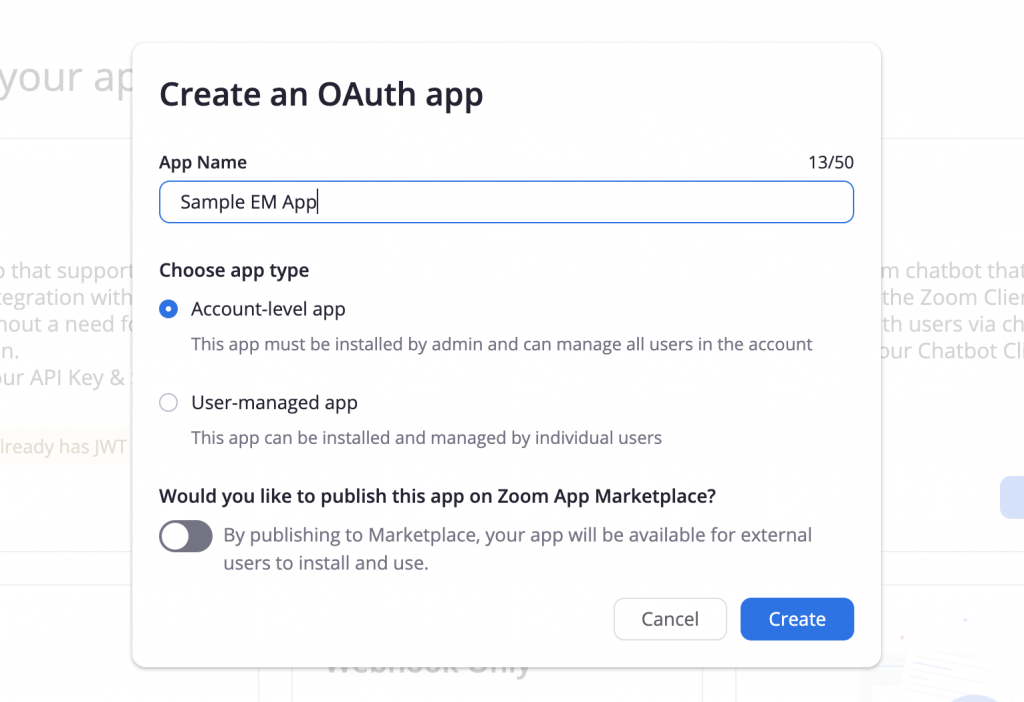
Here, you should select the 'Account-level app' and select NOT to publish your App. These are not required settings, but recommended for the majority of setups and will avoid extra setup.
Copy Client ID and Secret Key
You'll immediately be provided with your App Credentials. Copy the ID and Key over to your EM Zoom Settings, then save your settings.
Redirect and Whitelist URL
You will need to enter a Redirect URL for OAuth to connect your account with Events Manager. This URL is found on your EM Zoom Settings, and would look similar to the following:
https://yoursite.com/wp-admin/admin-ajax.php?action=em\_oauth\_zoom&callback=authorize
Additionally, you should also enter https://yoursite.com to the Whitelist URL textbox as well.
Scopes
The scopes you need to authorize will vary on whether you want access to Meetings, Webinars and/or Rooms, enable the 'User' scopes, and also the specific ones you need:
- Users
- View all user information (user:read:admin)
- Webinars
- View and manage all user webinar (webinar:write:admin)
- Meetings
- View and manage all user meetings (meeting:write:admin)
- Rooms
- View all users' Zoom Rooms information (room:read:admin)
Note that if you change your mind later on, you'll need to disconnect and reconnect your account (see further down), although you don't need a new Client ID and Secret Key.
Complete the app forms
Aside from these settings, you only need to enter the minimal required information to connect Events Manager with Zoom. Ensure on the Activation step there are no errors.
Step 3 - Connect your account
Once you have built your app and saved your app credentials, you will see the option to connect an account, like so:
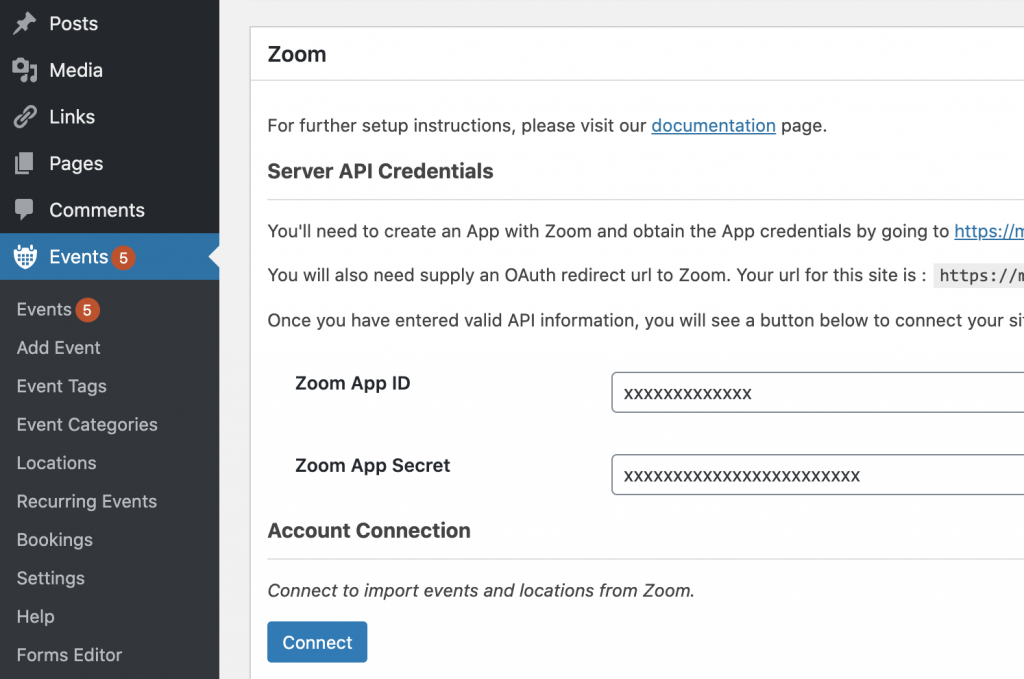
Click the 'Connect' button. You will be forwarded to Zoom where you will need to approve the App, then redirected back to a confirmation page.
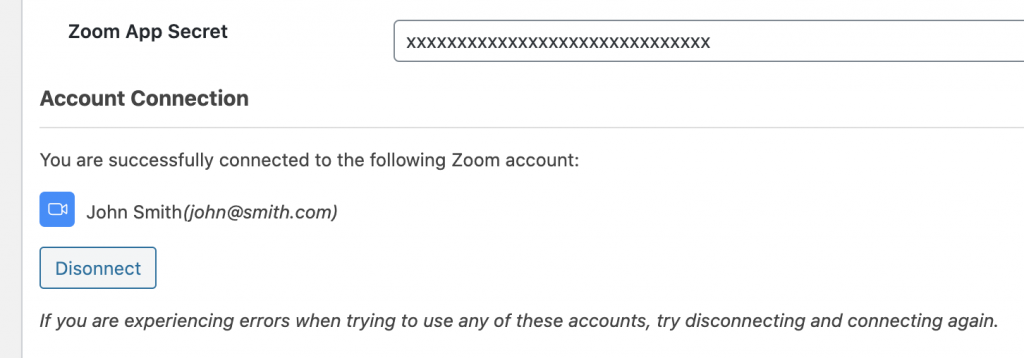
When you visit your EM Zoom Settings again, you'll now see a connected account:
Step 4 - Enable Location Types
Now that you've connected your Zoom account successfully, it's time to enable the Zoom location types you'd like to use. You can do this by visiting the EM Zoom Settings page, and open the General Options further up. Make sure locations are enabled in Location Settings and then make sure the Zoom items you'd like to use are checked, then save your settings.
Once you've done this, you will now see the available Zoom options on your location settings whilst creating an event.
For specific instructions on each type, see below: