Events with PayPal
PayPal Payments Standard integrates seamlessly with Events Manager Pro after a few simple steps. If you would like to test PayPal payments before going live, please see our PayPal Sandbox Mode setup instructions.
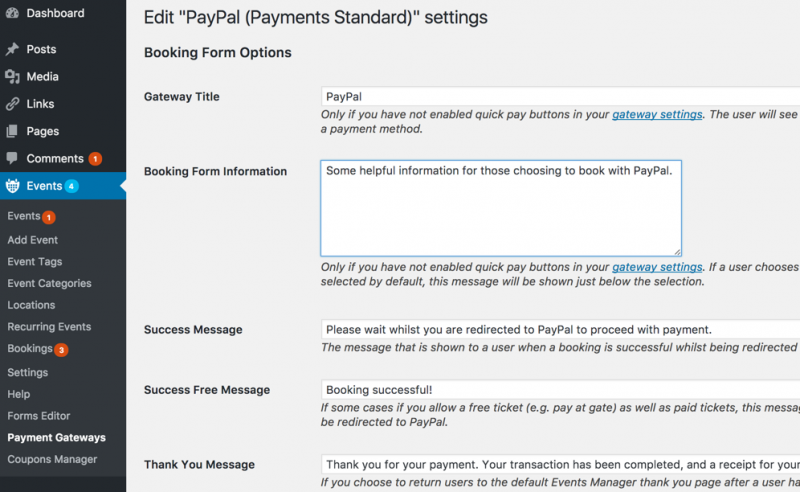
PayPal (Standard Payments) Gateway Settings Page
All of your settings for PayPal settings for Events Manager are located within the WordPress Admin Dashboard > Events > Payment Gateways > PayPal (Payments Standard)
There are only two crucial fields you need to fill in correctly to begin accepting payments.
- PayPal Email - This is your email registered to your PayPal account which will receive payments.
- PayPal Mode - For real payments, you’ll want this to be set to Live. You can use the PayPal Sandbox for testing with test accounts and simulated transactions, when doing so make sure you are using Test Mode.
You’ll see some more information about this page further down on this documentation page, but first, let’s configure your PayPal account so that it works with Events Manager.
Configure Your PayPal Account
In order for Events Manager to work smoothly with PayPal, you need set up your PayPal account on paypal.com so it can communicate with Events Manager during purchase transactions.
What PayPal Account Type Do I Need?
In order to start using PayPal, you need to sign up to an account which allows you to accept website payments, which are called Premier and Business. These account types are free to set up, and you can upgrade to one of these if you already have a PayPal account. Visit your PayPal country site for more information on what account will suit you best.
My Selling Tools Settings Page
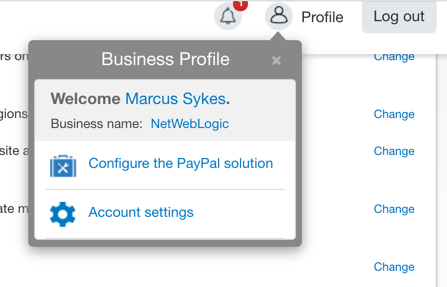
All the settings we’ll be referring to here are located in your My Selling Tools account settings page. To get there, Log into your PayPal account and click on the Profile icon on the top right of your screen, followed by Account Settings in the popup. On the next page, you’ll see the My Selling Tools menu link on the left of your screen.
If you don’t see a Profile icon on the top of your page, from your menu click on My Account > Profile > My Selling Tools.
Turn on IPN Notifications
IPN notifications are messages sent by PayPal directly to your site which inform us of when a payment has been made, refunded, cancelled etc. We use these notifications to automatically update the status of bookings.
Go to your My Selling Tools settings page, and click on change/update link next to Instant Payment Notification Preferences. Turn on IPN by following the instructions and using
http://yoursite.com/wp-admin/admin-ajax.php?action=em\_payment&em\_payment\_gateway=paypal
as the notification URL. You should see your exact URL required from within your PayPal gateway settings.
If you already have IPN enabled with another URL, you do not have to change this URL. Any valid URL will do so that IPN is enabled, since Events Manager provides PayPal the correct URL on each transaction.
Get Your PayPal API Credentials
This functionality is available as of Events Manager Pro 2.5
The PayPal API allows us to verify whether payments have in fact gone through, and in the future may allow us to do things like initiate refunds directly from within your Events Manager interface.
Currently, API credentials are optional, and are only needed if you would like to automatically delete bookings that have not been paid within a certain period of time, which can free up spaces if you want pending bookings to reserve spaces, as well as keeping your booking tables clean of unpaid bookings.
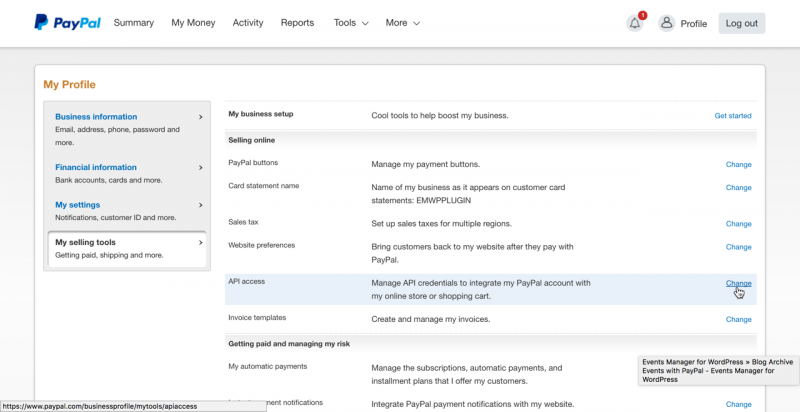
To obtain your API credentials, visit the My Selling Tools on your PayPal account, and click on the Update or Change link next to API Access. Find the section NVP/SOAP API integration and click the View API Signature link.
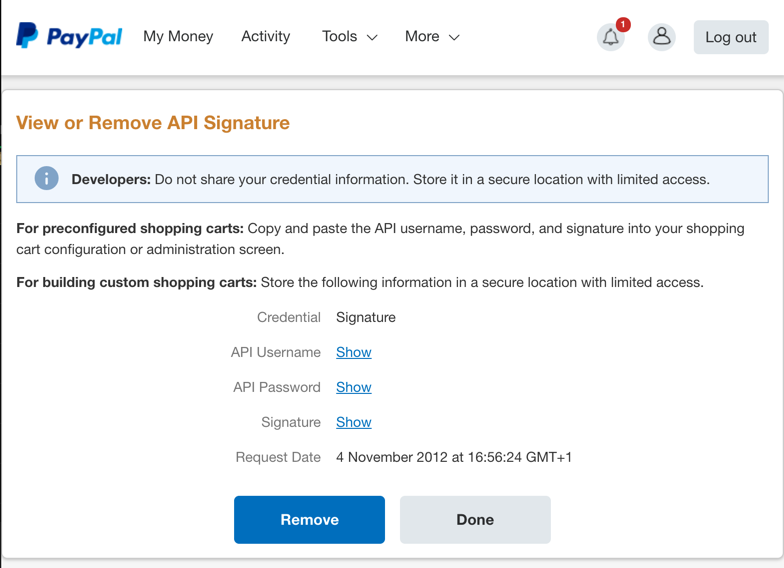
You will then be able to view your API credentials. These are sensitive bits of information, so make sure you keep this data safe, preferably doing a direct copy/paste from the PayPal website to your PayPal settings page on Events Manager.
Now that you have the API information available, open up your WordPress admin area in another browser tab (or window) and visit Events > Payment Gateways > PayPal (Payments Standard). There you’ll see a PayPal Credentials section requesting your API username, password and signature which you should have available in your other browser tab/window.
If you’re not using HTTPS/SSL in your admin area (which we strongly recommend), and you’re not in Sandbox mode with fake/test account data, we by default disable these text fields to prevent you from sending this sensitive information unencrypted over the internet. For alternatives, see our documentation on safely uploading your PayPal API Credentials.
Additional PayPal Account Configuration Options
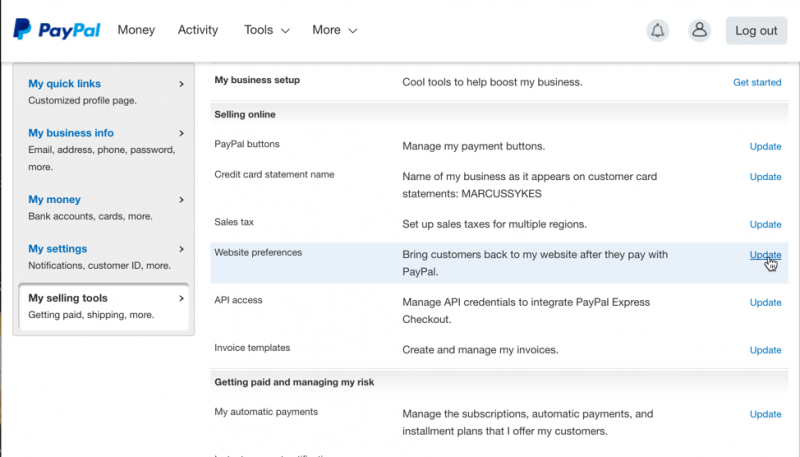
Aside from IPN and API settings, you may also want to enable some additional settings within your PayPal account. Whilst there’s many options which are well by PayPal support pages, there’s a few we’ll cover here. These are located within My Selling Tools > Website Preferences.
Auto Return (Redirection) after Payment
PayPal gives you the option to redirect your customers back automatically to your site after a successful payment has completed.
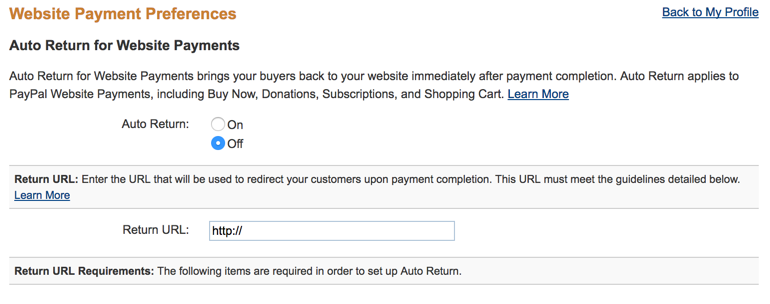
Whilst you can use any page on your site and it should include a confirmation of payment, you can also use your ‘My Bookings’ page URL with ?thanks=1 at the end, similar to this - http://yoursite.com/youreventspage/my-bookings/?thanks=1 - as the return URL. This will give a basic message that adheres with PayPal’s auto-return requirements.
If you already have this set up for another website or plugin, you can leave it as is, and enter the return url in our gateway settings, which will take precedence for payments made with Events Manager.
Paying Without a PayPal Account (PayPal Account Optional)
For those customers who don’t have a PayPal account (or don’t want one), you can enable the option for the to enter their payment information directly without logging in or registering for a PayPal account. For this, you’ll need to turn on the PayPal Account Optional setting, located further down the Website Preferences settings page.

Additional Gateway Settings
Once you have configured your PayPal account, it’s now time to set up your PayPal gateway settings within Events Manager.
First, go into the PayPal settings and make sure that your crucial settings mentioned further up are correct: PayPal Email, PayPal Mode and API credential fields (if applicable).
Take a look at the other fields and change accordingly, and save your settings.
When you save, you’ll be taken back to the gateways page. Hover over the PayPal (Payments Standard) gateway and click on the activate link to start the Gateway, and from now on events with bookings will have PayPal as a payment option!
All fields come with a short explanation, but here’s some more information on a few that may be of particular interest.
Delete Bookings Pending Payment
Since users are redirected to PayPal for payment, in some cases they may abandon the purchase during payment, and the booking will remain pending payment for this reason.
With this setting, these bookings that have not been paid yet will be deleted after X minutes have passed since the booking was made. This allows you automatically to clean up unwanted bookings and also opens the possibility of reserving bookings pending payment.
In many situations, you’ll want to prevent the possibility of overbooking an event, especially if your events sell out fast. By enabling this feature, you reserve the spaces they want and allow a time-frame for people to finish the payment process. This prevents a situation where two people trying to book the last ticket for an event at the same time before either one has completed the payment on paypal.com.
Note that as of Events Manager Pro 2.5, valid PayPal API Credentials are required for this setting to work. This prevents accidental deletions should the IPN notifications fail to reach your site or properly mark a booking as confirmed.
Manually Approve completed transactions?
After a payment has been made, by default bookings are considered approved/confirmed and their status is automatically changed. By checking this box, bookings will be set to pending for your final confirmation.
Return URL
If you have set up Auto Return for Website Payments, the URL you enter in this field will override the one saved in your PayPal account. This is useful in situations where you have more than one site or plugin processing PayPal payments with the same account.
If you haven’t enabled this feature, if you add a URL here, it will be displayed on the PayPal.com payment confirmation page as an option to return to the seller (that’s you!) website.
Language
This list is limited according to languages supported by PayPal, as indicated on their documentation (see the lc variable).
How the Payment Process Works
When a user signs up to an event with PayPal, a pending reservation is made for the user (whether logged in or not) and they are passed onto PayPal. Once they make their payment, they will be forwarded back to your website.
Behind the scenes, PayPal notifies your site of the payment transactions, and if successful a user account will be created (if not registered already) and the booking confirmation email will go out to the user.
You will be able to see transaction history from any of the booking pages.
![]()
Cancellations/Refunds
Events Manager does not initiate refunds on your PayPal account. However, refunds or chargebacks initiated on PayPal.com will automatically change the status of a booking to ‘cancelled’ if refunded in full, or ‘pending’ if partially refunded.
If a user cancels their booking on your website, you will be notified by email, and you should proceed to manually refund the payment on your PayPal.