Our Autorize.net AIM gateway allows you to charge users who enter their card details on your site. Events Manager submits this information to Authorize.net for processing and approves the booking if successful. In this case, the user never has to leave your site.
If you want to test Authorize.net without using real cards and payments, please view our Authorize.net Sandbox tutorial.
Important Notes
It’s important to note that since you are accepting Credit Card information over the internet, it’s absolutely necessary that you have valid SSL certificates on your site, otherwise, this will not work! Events Manager will always force an HTTPS connection when a booking form accepting Authorize.net in live mode is used. When using sandbox mode, we do not impose any SSL requirements since you’re not using real payment information.
We do not force the event page or any other page showing a booking form to be over HTTPS, we do however always force the destination where the form data is sent to be an HTTPS address, ensuring all data is safely transmitted. If you want to force event pages or any other specific pages to use SSL, consider using a WordPress SSL plugin such as Really Simple SSL, WordPress HTTPS, or alternatively use a PHP snippet we created.
Since this gateway requires extra fields to be filled in, this gateway cannot be used with single quick pay buttons (e.g. paypal and offline payments).
Setting Up Authorize.net Account
Once you’ve registered for your authorize.net account, there’s three important pieces of information you need to obtain/set up. These are your:
- API Login ID
- Transaction Key
- Signature Key (optional for notifications)
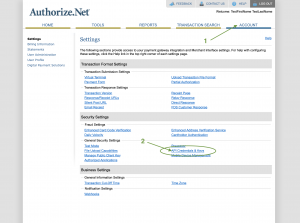
All three can be obtained from your authorize.net control panel under Account > Settings > API Credentials & Keys, we recommend you check out Authorize.net’s instructions for further clarification.
You will need to request both the transaction and signature keys, if you haven’t previously generated them before, you will need to do so now and store them in a safe place unless you want to regenerate them from scratch (regenerating keys will invalidate previous ones).
Set Up Gateway
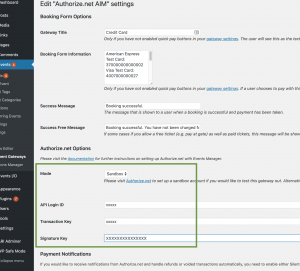
Now you need to enter the key information from before into the gateway settings page. Bear in mind that you need to select the right type of mode you are in. If you are using a sandbox, make sure you choose a sandbox mode, or vice versa.
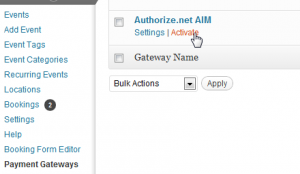
Now that you have saved the necessary information, you are ready to activate and set up the gateway. First things first, visit Events > Payment Gateways in your admin area and click ‘activate’ beneath the Authorize.net AIM gateway.
There’s many more settings for you to choose from on this page with helpful explanations. Here are some specific that may interest you:
- Manually approve completed transactions? – If selected, successfully paid bookings will be marked as ‘Pending’ rather than ‘Confirmed’
- Email Customer (on success) – This sends the user sends the default authorize.net confirmation email, you can add additional information above and below it with the following input fields.
Passing On Address/Personal Information
If you would like to pass on common personal/address information for usage in the Address Verification Service (AVS) or to provide further information in your transaction reports, you need to associate address fields with user fields in your form editor.
Set Up Refund/Reversal Notifications
Refunds must be initiated from your Authorize.net control panel. You can set up Events Manager Pro to track refunds and automatically cancel a booking payment that has been refunded or voided.
If you would like to track refunds and voided transactions on authorize.net, you need to first have obtained your Signature Key and saved it in your settings during the initial setup instructions above. Once that’s saved you can proceed to activate Webhooks and/or Silent Posts. We strongly recommend setting up Webhooks, as Silent Posts will likely be deprecated by authorize.net in the not too distant future.
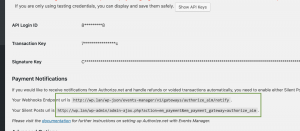
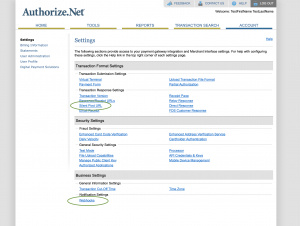
Firstly, visit your Authorize.net settings page in Events Manager via your WordPress Dashboard > Events > Payment Gateways. There, under the Payment Notifications section, you’ll find the URLs you’ll need to enter into either Webhooks or Silent Post settings on Authorize.net
Once you’ve obtained your desired url notification destination url, copy it and visit either of the settings page. Silent Posts simply require you to paste the URL and save.
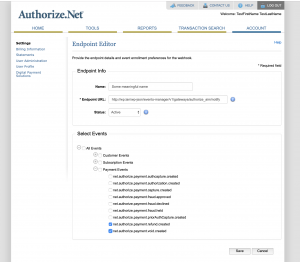
Webhooks have a couple more options but are also very straightforward. Copy your Webhooks endpoint, which will be similar to http://yoursite.com/wp-json/events-manager/v1/gateways/authorize_aim/notify and then click the ‘Add Endpoint’ button in the Authorize.net Webhooks settings page. Paste your url into ‘Endpoint URL’ field , provide a meaningful name (if any) and make sure it’s selected to be active. Finally, ensure you checked the net.authorize.payment.refund.created and net.authorize.payment.void.created options. Your settings will look very similar to the screenshot below.
That’s it! You’ve set up notifications. You can even set both up if you wish, although as recommended by Authorize.net we recommend going with Webhooks.
Finishing Up
That’s it! You’re now ready to process payments.
If you visit an event page, you should now see an option to pay with this gateway. If you have more than one gateway enabled, this will be available from the gateways drop-down list (which can be renamed from within the same options page as above). If this is the only gateway available, the credit card fields will be shown with no gateway choice.
